Tone Generator
User Manual
v1.6
Using ComTekk
1. Running ComTekk Tone Generator
After the trial period, users must enter their user registration information to enable the special features of the software. This will be sent via email after purchase is made.
Once ComTekk has been successfully installed, you may simply double-click the ComTekk desktop icon or Click the Windows Start menu, then Programs, choose the ComTekk folder, then ComTekk.
While ComTekk is loading, the Splash screen will show progress and status. Click OK to close the Splash window after status shows "Ready."
There are several ways to exit ComTekk.
- Click the "X" box in the upper right corner of the Toolbar window.
- Click the large "X" button on the Toolbar.
- Select the "File" menu, then "Exit"
Please note that if you have more than one audio device installed, ComTekk will only use the system's default sound device.
Continue on to Section 2 below for detailed description of the Menus and Toolbar...
2. The Tone Generator Menus

File Menu:
- Settings - open the Settings window
- Exit - close ComTekk
View Menu:
Selecting any item from this menu will TOGGLE it ON or OFF.
Generate Menu:
Selecting any item from this menu will TOGGLE it ON or OFF.
- Tone - Tone Generator console
- DTMF - DTMF Encoder console
- CTCSS - "PL™" Tone Encoder console
- Tone Paging - Tone Paging Generator console
- Tone Remote - Tone Remote Control console
- 5/6 Tone ANI - 5/6-Tone ANI/Selective calling Generator console
Tools Menu:
- Spectrum - Spectrum Analyzer screen
- Scope - Oscilloscope screen
- WinVolume - OPENS the Windows Volume Control mixer
Help Menu:
- Contents - Displays Help Contents
- Website - Directs default browser to ComTekk's Internet home page
- About - Shows general info about ComTekk, version, registered user
3. The Tone Generator Toolbar
All of ComTekk's Generators, Encoders and Tools can be activated by clicking once on the appropriate toolbar button (below).
NOTE: Helpful Hints are revealed by stopping the mouse pointer on any of the buttons or fields throughout ComTekk.
Toolbar Buttons:
![]() Tone Generator
Tone Generator
![]() DTMF Encoder
DTMF Encoder
![]() CTCSS Encoder
CTCSS Encoder
![]() Tone Paging Generator
Tone Paging Generator
![]() Tone Remote Generator
Tone Remote Generator
![]() 5/6 Tone Encoder / ANI
5/6 Tone Encoder / ANI
G Gaussian (white) Noise Generator
![]() Scope
Scope
![]() Spectrum Display
Spectrum Display
![]() Settings
Settings
![]() Mixer Panel
Mixer Panel
![]() Exit
Exit
4. Tone Generator Mixer Panel
ComTekk Mixer:
If the Mixer is not visible, click the Mixer toolbar button, or select the "View" menu, then click "Mixer." There will be a check-mark next to the menu item showing whether it is visible.
Use the sliders to adjust the relative output level for each corresponding generator or encoder. This is especially useful when generating multiple signals simultaneously, such as Tone Remote with Tone Page and CTCSS.
The "Tone" slider also controls the noise generator level. The deciBel (dB) indicators at the bottom of each slider indicate the relative output. 0dB is maximum, i.e., no attenuation.
Use the STOP button to immediately stop all generators and encoders. This will discontinue all output from ComTekk. It will not affect other Windows applications.
5. Windows Mixer Controls
From the main menu, select Tools->WinVolume or press Ctrl+V
Windows Volume Control (Output): [Windows 95, 98, NT, XP, 2000, ME] - scroll down for 7/Vista.
This screen controls the sound card OUTPUTS and will generally have no effect on the decoder, since it uses the sound card INPUTS, which are controlled by the Recording Control (see next section below).
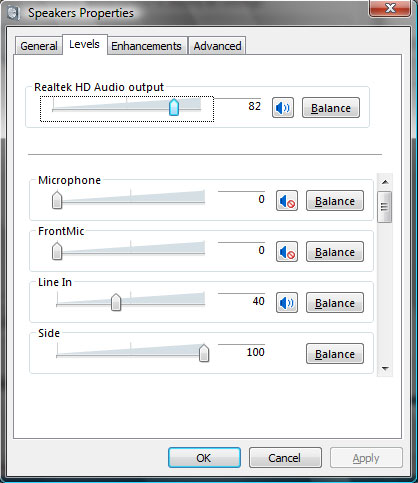
Windows Vista/7 playback [output] settings, accessible from Windows Control Panel
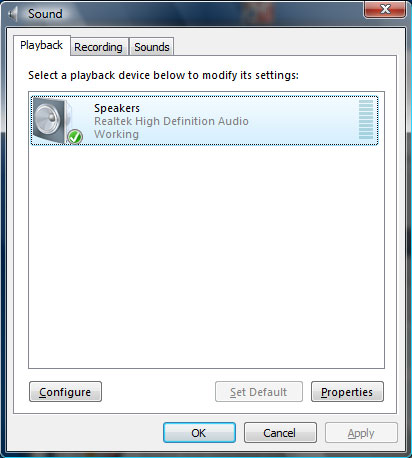
Click "Properties" then select the "Levels" tab for output mixer controls. Again, these controls will have NO effect on the decoder's operation:
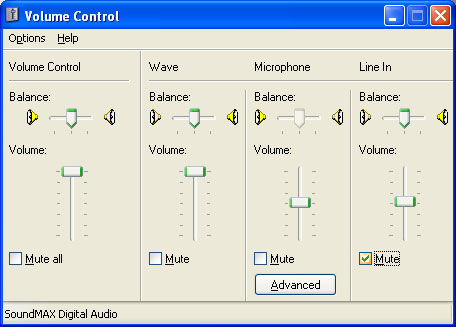
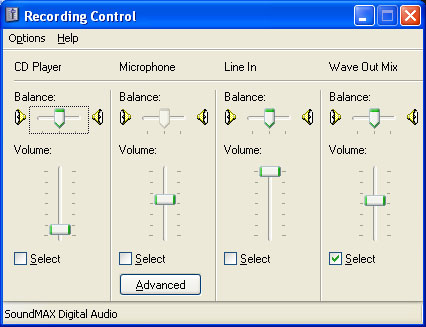
The Windows Recording Control [Windows 95, 98, NT, XP, 2000, ME] - affects sound device INPUTS, such as LINE , AUX, Wave, or Microphone. Vista/7 users, scroll down.
To access Recording controls, click the Mixer button in the Settings window, or with a double-click on the speaker icon in your system tray. Select "Options" from the menu, then "Properties." Click the "Recording" radio button. Be sure the appropriate input item is checked. Settings will be saved on closing this window.
It is very important to have the correct input device enabled, otherwise the decoder will not function.
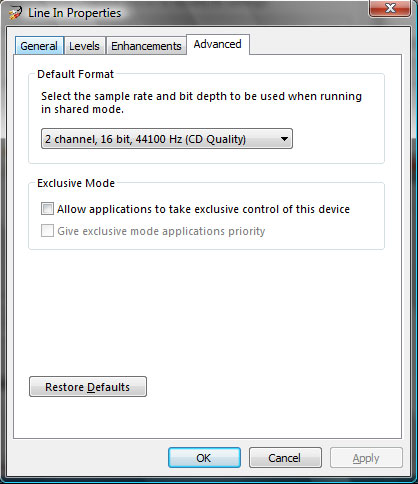
For Windows 7/Vista users, click the Mixer button in the Settings window. Line In is selected in the example below.

Click "Properties" then select the "Levels" tab for Line In level control. This sets the audio level sent to the Tone Decoder. Adjust this level while there is activity on the receiver. Monitor the decoder's VU meter, and set for a mid-range indication.
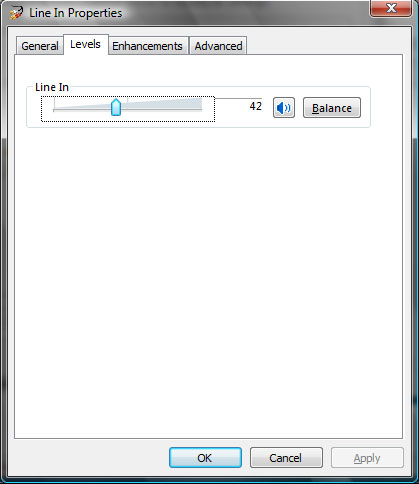
Additionally, the program may be given exclusive control of the selected device by checking the box below. This prevents the user from accidentally changing settings for this device. While not required, this option may be helpful in some situations.